Traveling light and diving free off Lanzarote’s shores or from a small rib has taught me to obsess over one thing: a weight system that’s reliable, compact and easy to adjust on the fly. A good freediving weight setup keeps you safe, helps you trim correctly and saves precious time when swapping beaches or jumping off a tiny boat. Below I share exactly how I put together a travel-friendly system, how I trim it for both shore entries and small-boat drops, and what I always pack for every freediving trip.
Why a travel-friendly weight system matters
When you’re moving between beaches, hopping on small charter boats or packing weights into a suitcase, bulk and complexity become real problems. A system that’s compact, modular and quick to don/doff reduces stress and mistakes — and in freediving, that can be the difference between a relaxed session and a sketchy one. I favor setups that are flexible: easy to add or remove weight depending on suit thickness, fresh or salty water, and whether I’m launching from a pebble beach or stepping off a dinghy.
The core components I use
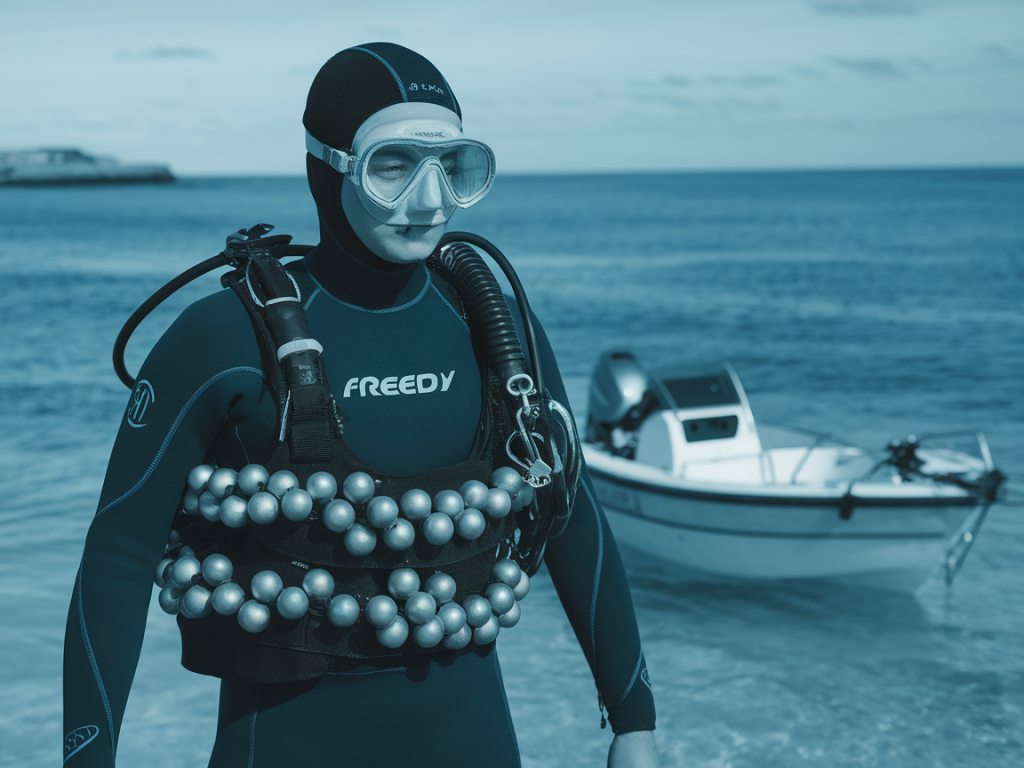
- Low-profile weight belt: I use a simple webbing belt with a sturdy stainless-steel low-profile buckle (Cressi’s low-profile buckle or Spetton’s similar designs are solid). They fold flat in a bag and won’t jam like old chrome buckles.
- Soft zippered weight pouches: I prefer small neoprene pouches with zip or velcro closures. They protect the weights from rattling and keep pockets quiet on boats. Brands such as Mares and Akona make pouch kits that fit 0.25–1 kg plates.
- Fractional weights: Bring lots of small increments: 100g, 200g and 500g plates. They pack better and make fine-tuning trim much easier than only having 1 kg plates.
- Quick-release option: Even though we freedivers rarely ditch all weights, I carry a quick-release system (a simple cassette-style buckle or a dedicated quick-release weight pouch) for emergencies and for assisting buddy drills.
- Optional ankle weights: For long monofin sessions or heavy suits I carry small 100–200g ankle weights to tune feet-down trim when needed.
Packing strategy for travel
I always divide weights across my luggage and hand-carry the essential items. Here’s my packing routine:
- Carry-on: one small pouch (200–500g total) and belt with buckle (empty if airline rules require). This is my emergency/arrival kit so I can dive as soon as I reach my destination.
- Checked luggage: the bulk of the plates in wrapped plastic (to avoid corrosion and keep clothes dry) plus extra pouches.
- Boat bag: a slim, zipped pouch with the belt and a selection of fractional plates (100–500g) and zip ties or bungy for temporary fixes.
Trim basics: what I check before a dive
Trim in freediving is about balance. You want to float horizontally at the surface with your airway just at or slightly above the waterline, and sink feet-first on descent without fighting weight distribution. My step-by-step check:
- Surface test in full kit (mask, suit, weight belt, fins): float relaxed face-down. If hips and legs sink, remove weight from the belt or shift a small weight to ankle pockets. If you’re tail-sitting (legs high), add small increments at the belt’s rear.
- Test in both fresh and salty water mentally: salty water gives more buoyancy, so expect to need slightly more weight in the Atlantic compared to a lagoon or freshwater dive site.
- For shore entries: I usually add 100–300 g extra compared with boat drops because the initial dynamic move and currents can feel different — adjust after the first two dives.
- For small boats: I trim forward slightly (weights a touch more central) so the boat’s rocking while entering doesn’t pull my legs downward when I step off the gunwale.
Shore entries vs small-boat entries: practical differences
Shore entries and boat drops are different animals. I approach them like this:
- Shore entries: You may need extra mobility and often a little more weight to overcome surge and initial swim effort. I favor an easily removable belt and keep a lightweight pair of flip-flops for rocky access so I don’t need heavy boots that change buoyancy.
- Small boats (RIBs, dinghies): Space is tight and there’s risk of snagging buckles. For boats I secure the belt so it won’t fall off during the step-off, and I prefer recessed or flat buckles. I keep my small weight pouch within arm’s reach on the deck for last-minute tweaks and for quick retrieval if the belt comes off unexpectedly.
Safety considerations and emergency drills
Even a tiny weight system can be dangerous if it jams or becomes irretrievable. Safety first:
- Never rely solely on a permanent integrated system without a redundant quick-release. Zip-up weight pouches should have a secondary pull cord accessible while wearing the belt.
- Practice ditching your weight quickly and cleanly on land. I practice with my buddy until we can remove the belt under 2–3 seconds while simulating tensing from a breath-hold.
- Carry a surface marker buoy (SMB) and line. If you need to drop weight and float to the surface, you still want clear signaling for the boat or shore team.
- Buddy check: before every session I run a three-point check—belt secure, quick-release accessible, weights distributed in fractional plates. My buddy looks for symmetry and accessibility.
What I always pack: the essential checklist
| Item | Why I bring it |
| Webbing belt with low-profile buckle | Compact, foldable and less likely to snag on boat fittings |
| Small zippered weight pouches (2–3) | Protects plates, stashes fractional weights, quiet on boat deck |
| Fractional plates (100g, 200g, 500g) | Fine-tune trim with precision |
| Quick-release pouch or cassette | Emergency ditch option and buddy-assist tool |
| SMB and reel | Signaling and safety in open water |
| Small ankle weights (optional) | Trim tuning for monofin or heavy-suit days |
| Zip ties, duct tape, extra webbing | Field repairs for unexpected failures |
Maintenance tips for long-term travel use
Salt and sand are relentless. My maintenance routine keeps the system reliable:
- Rinse everything in fresh water after each day. Open pouches and dry fully to avoid corrosion.
- Lubricate metal buckles lightly with silicone spray (not oil) and wipe excess—this keeps quick-release mechanisms smooth.
- Replace webbing belts every few seasons if they show UV wear or fraying. A failing belt is a hazard I won’t risk.
- Wrap plates in a zip bag inside luggage to prevent rust stains and to keep them together when traveling.
Over the years I’ve refined this kit to save space in my suitcase and reduce faff at the waterline. My rule of thumb: carry a minimal set on your person or in your carry-on, enough to dive safely on arrival, and stash backups in checked luggage or on the boat. Tuned properly, a lightweight, modular system gives you the freedom to adapt quickly to Lanzarote’s shifting beach conditions or a last-minute boat trip — and that freedom is exactly why I love freediving here.