Famara is one of those places where the Atlantic writes its own rules — and where I never get bored of discovering small changes in wind, swell and sandbar shapes that completely alter a windsurf run. Over the years I've spent countless sessions on this coast, from relaxed freeride to hard-charging wave days. Below I share five coastal runs I love for confident riders, plus practical advice on where and how to rig your board, safety notes, parking and kit choices that actually matter out here.
Why Famara feels special
The long sandy beach, backed by the dramatic Riscos de Famara cliffs, produces a variety of conditions within a short distance. Onshore thermal winds (thermal sea breezes) tend to build in the afternoon in summer, while winter brings stronger Atlantic swells and more northerly winds. You can go from flat water close to the shore to punchy waves and cross-shore ramps a few hundred metres down the coast — that variety is why I keep coming back.
Where to rig your board — quick practical guide
Rigging location matters more here than in sheltered spots. Launching from the wrong place can mean fighting shorebreak on launch, or being pushed onto rocks when a gust arrives. My rule of thumb is: rig where the wind is clean, and keep a clear view down the beach.
| Spot | Where to rig | Why |
|---|---|---|
| Caleta de Famara (main car park) | Upper car park (windier) or grassy dunes | Good view of the beach; safe from shorebreak; easy to walk to launch |
| La Caleta (southern end) | Beach access near the lifeguard tower | Cleaner wind offshore, avoid rigging behind buildings |
| El Ancla (north end) | Small dirt area behind dunes | Quieter parking; closer to wave runs but watch boulders |
When I rig I always face the sail into the wind, check for gusty patches (often amplified by the cliffs) and walk a quick reconnaissance to spot soft sand or hidden rocks. If the wind is flukey, rig a little smaller than you think — losing a session to overpowered gear is no fun.
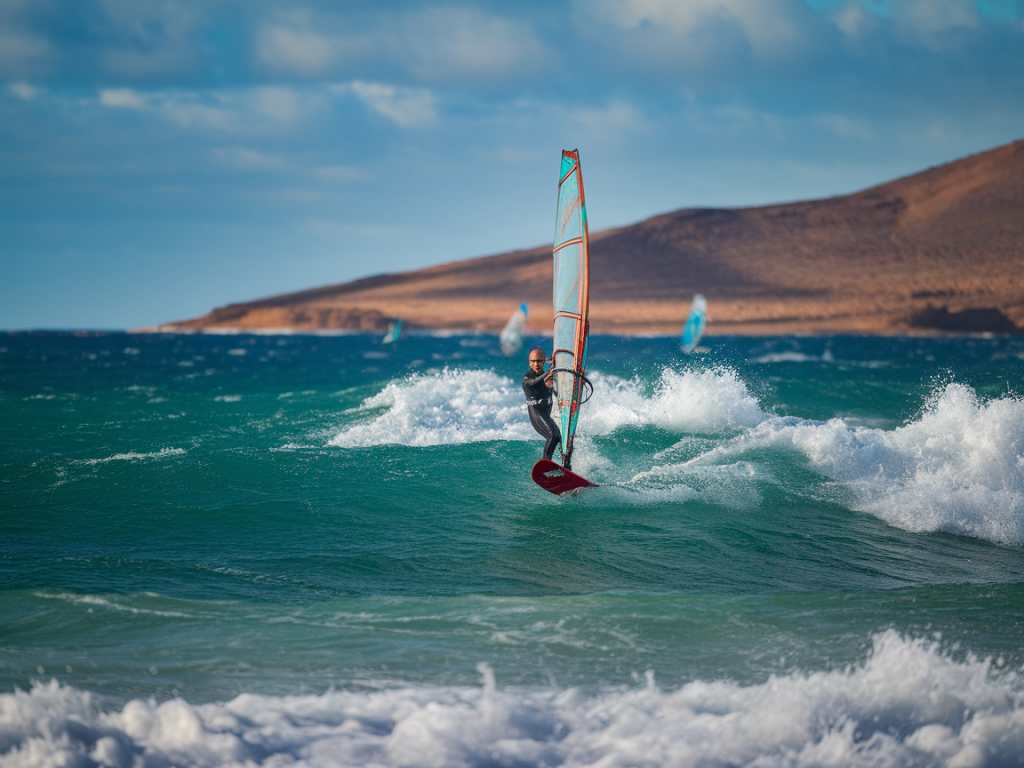
Five runs I ride again and again
Below I describe the runs by location, what to expect, who they suit and tips on rigging and safety. These are aimed at confident riders — if you're still working on planing gybes or wave technique, pick calmer days or go with a guide.
This is my go-to when the wind is moderate (15–25 knots on the beach). Launch near the central car park and ride parallel to the shore. The shallow sandbar often smooths the surface just beyond the shore, giving a broad stretch of semi-flat water with occasional small ramps created by short swell. Ideal for freeride, speed drills and working on board control before pushing into the waves.
Rig: 6.0–7.5m for most riders depending on weight and wind. Use a board with some volume (90–130L) if you want earlier planing.
Head north toward the point for consistent wave faces when there's a swell from the NW to W. The point bends the swell into clean peaks with lefts and rights depending on exact swell direction. This area suits riders comfortable with wave equipment and confident in down-the-line speed and bottom turns. The take-off zone can be shallow on low tide.
Rig: 4.2–5.8m on solid blows; smaller for strong winter storms. Bring fins with good hold (e.g., thruster or wave-specific setups).
When the wind is steady side-onshore or cross-shore from the NE to E, the south stretch of the beach produces long, surfy runs with less crowding. It's great for carving rides and practicing powered jibes — on a clean wind day you can link turns and ride for hundreds of metres. Watch out for river mouths and shifting sandbars after rain.
Rig: 5.0–7.0m depending on gustiness. I like a stable 60–90L board with a responsive outline for linking turns.
There are sections toward the northern end where boulders and reefs shape the waves into punchy chunks. This is for advanced riders only: launching and landing require precise timing and local knowledge. I only pick this area on steady winds with spotters onshore and when water visibility makes hazards clear.
Rig: 3.5–4.8m in winter surf; compact wave board, protective wetsuit and boots if you're worried about sharp rocks.
On lighter afternoons when thermals build but the swell is small, you can ride close to shore on semi-flat sections created by the sandbar. This is my favourite spot for pop, freestyle moves and jumping without committing to big waves. Crowds can be higher here in summer; keep space when practising aerials.
Rig: 5.5–7.5m depending on strengh; freestyle board (90–110L) or small freeride board with low push.
Gear I bring and why it matters
My kit list is shaped by practicality for Lanzarote conditions — salty, gritty and often strong. I trust daKine and Severne for harnesses and sails; NeilPryde and Duotone have strong wave and freeride options that hold up well. Always rinse sails and lines after a session to avoid sand damage.
Safety, tides and local etiquette
Famara can change fast. I check wind forecasts (Windy, Windguru) and compare them with local observations. Watch tide times: some runs expose rocks at low tide or change sandbar profiles. Basic tips I never skip:
When in doubt, talk to local shops. The kit and advice you get from rental centres in Famara or Caleta are invaluable — they know which spots are dialled and which to avoid when the swell lines up wrong.
Getting there and parking
There’s a main car park above the beach near Caleta; it fills quickly on sunny afternoons. Smaller dirt parking spots exist at both ends of the beach but are best suited to smaller cars. If you’re bringing a roof rack, plan for the walk to the dunes — a trolley helps. For early-morning or winter sessions, bring layers and a thermos; the wind makes the mornings chillier than the island’s reputation suggests.
If you want a local-guided session, I usually coordinate with a few of the family-run schools in Famara — they’ll show you exact take-offs, tide-sensitive zones and safe exits. If you’re an independent confident rider, keep these runs in mind and respect the coast: it gives so much when treated with care.